
The Web Map Service (WMS) is an Open Geospatial Consortium (OGC) specification that defines an HTTP interface used to request a georeferenced map in an image format from a server. GeoServer supports WMS 1.1.1, the most widely used version of WMS, as well as WMS 1.3.0. WMS provides a standard interface for requesting a geospatial map image. This is an advantage because WMS clients can request images from several WMS servers, and then combine them into a single view for the user. The standard guarantees that these images can all be overlaid on one another as they actually would be in reality.
This tutorial outlines the step-by-step process to display the WMS layer from GeoServer to a Leaflet map using Vue Js.
Install NPM
Npm is the world’s largest registry used for the management of the development, sharing and borrowing of packages. Moreover, npm helps to download and use standalone tools. In this case, we will use npm to install some of the dependencies like the Leaflet. To install npm:

- Open command prompt
- On the command line interface, run the following code
npm install
3. Press Enter to run
Install the WMS Plugin for Leaflet
In order to load the WMS layer from GeoServer on the Leaflet map, you need to install the WMS plugin for Leaflet. To install it:
- Navigate to your project folder in your code editor terminal
PS D:\LiGIS\vue_to_leaflet>
2. Run the following command
npm i leaflet.wms
Set Up the Map Container
Navigate to your App.vue file and set up the map container which will be used to display the map tiles and the WMS layer.
<template>
  <div id="app" style="height: 100vh; width: 100%">
    <div id="map" style="height: 100vh; width: 100%; ">
    </div>
  </div>
  </template>
Use the Installed Plugins
Import the installed WMS Plugin for leaflet and other leaflet components inside the <script> tags.
import L from "leaflet";
import {latLng} from "leaflet";
import "leaflet.wms";
Create the Map Object
Inside the mounted () hook, add the following code to create the map object
var vm = this;
vm.map = L.map("map", {
   zoom: 7,
   center: latLng(0.02, 37.9),
});
Add TileLayers
Create OpenStreetmaps and Stamen tile layers and add them on the map object.
var stamenLayer = L.tileLayer('//stamen-tiles-{s}.a.ssl.fastly.net/watercolor/{z}/{x}/{y}.png', {
attribution:
'Map tiles by <a href="http://stamen.com">Stamen Design</a>, ' +
'<a href="http://creativecommons.org/licenses/by/3.0">CC BY 3.0</a> — ' +
'Map data {attribution.OpenStreetMap}',
}).addTo(vm.map);
Add the WMS Layer
Create the WMS layer using the L.tileLayer.wms class and pass the link to your WMS layer hosted in GeoServer.
 var wmsLayer =  L.tileLayer.wms("http://localhost:8005/geoserver/kenya_national_parks/wms", {
                layers: " kenya_national_parks:nationalparks",
                format: "image/png",
                opacity: 1.0,
                transparent: "true",
                version: "1.1.0",

              });
              wmsLayer.addTo(vm.map);
Add the Layers Control
Create the Layers control which will help you to switch between layers, i.e the tile layers and wms layer and add it to the map.
var tile_layers = {
                'OSM': osmLayer,
                'STAMEN': stamenLayer,

              };
              var overlayMaps = {
                'WMSLayer': wmsLayer,
              };
 L.control.layers(tile_layers, overlayMaps, {collapsed:false}).addTo(vm.map);
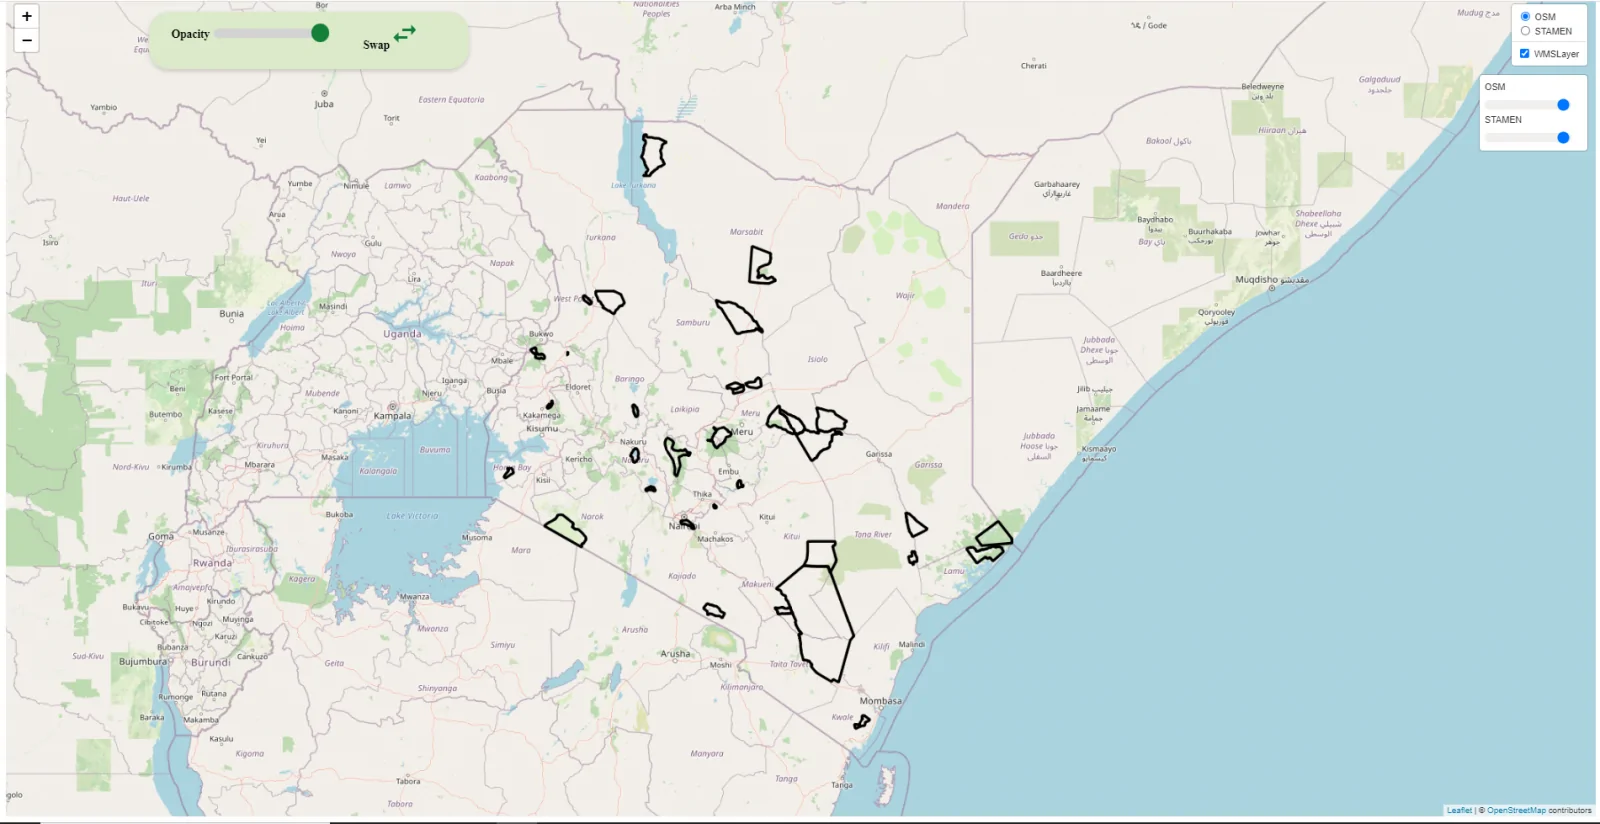
Display the Results


hi..im getting error 401…what should i do in geoserver config
What specific bit is throwing the 401 error?